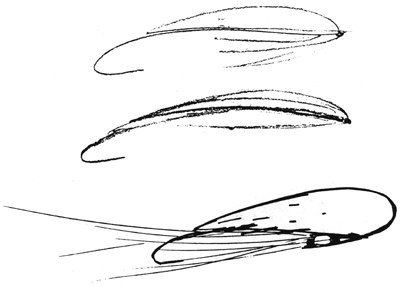

PIANO WIRE HOOKS
by Steve Fernandez
Reseda, California
I started making piano-wire hooks after sketching a few flies that were unrealizable on modified existing hooks. Forced to make my own hooks, I was freed from the constraints imposed by available hooks and allowed to explore a much wider range of ideas. A really nice thing about this, beyond the expansion of my horizons, is the chance to apply the revelations to my work on modified barleets. It is a wonderfully vicious cycle--it continually feeds itself.
Working back and forth between drawings and flies is simultaneously rewarding and exasperating. I'll come up with a terrific idea on paper which I am confident I can tie. It's THAT easy. So I set out to tie the fly, unaware that it will take me twenty to forty hours of work to realize that feathers will not quite do what I want, and I have designed an impossibility. Okay, I've learned something, learned a lot actually. Perhaps I consciously use the lesson on the next fly, but the lessons usually slip into my unconscious, popping up later as nice surprises. Sometimes everything happens very quickly; then everybody is happy and I can get some sleep.
I have often been asked where I get my ideas. Everywhere: fishing, billboards, other people's salmon flies (there are so many wonderful tiers working today), music, totally unrelated things. I usually can't explain where such and such an idea literally came from--somewhere from the stew of my life. Some ideas are "accidents"--seeing a black golden pheasant crest lying across a hook in a certain way inspired one fly, for example. Ideas are ideas; where they come from doesn't really matter. Experimentation and the process of application are what count. Experimentation is very enjoyable and I encourage everyone to try it. I find great pleasure in applying things I have discovered to the very occasional "classic" I tie.

By painting the hooks various colors (or leaving them as bare steel) you can add to their visual qualities. For me, the hook often substitutes for the body. My splatter-painted hooks are a particular example. Different qualities can be obtained by painting the hook gaudy or otherwise bright colors, and then splattering another color over it, toning down the base color and creating a very interesting pattern. Splatter painting is accomplished by dipping a toothbrush into paint and then flicking the thumb against the bristles to spray the paint over the hook. Clean the toothbrush first! I paint with cheap epoxy and enamel spray paints and bake the hooks in a 325-degree oven for one hour, or until a toothpick inserted in the center comes out clean. Not very high tech; there are more durable finishes out there.
The fly pictured on the cover (which has no name) is based upon the idea of a continuous curve along the leading edge of the wing and throat, sort of a stretched Pompadour. I wanted a very spare, minimal sleekness to the fly, hence no body or tail. The materials are all tied in at roughly one location. I extended the hook shank forward of the head to create a dynamic between the wing curve and a line asymmetrically "spearing" the curve, keeping everything a little off balance to help create a feeling of movement.
The wing is a pair of bleached argus pheasant wing sections fashioned in the style I use for the Pompadour, here in a more slender, elongated form, tapering to a tangent with the bend of the hook. Three long, bleached fibers as the throat, such as goose shoulder or other heron substitute, continue the outline of the wing curve from above. A light greenish blue "throat dubbing" of floss fills out the front of the fly and covers the area where the wing is tied in.
I have always liked the slender nails found after the hackles at the back end of a full jungle cock cape. They are elongated, single eyes. I tied them in leaving a lot of bare stem showing so as to position them slightly aft of the throat area, floating the eyes in the negative space between the throat and the wing. The white stem also continues the line of the hook shank past the dubbing. White thread for the head becomes clear when lacquered, helping it to disappear.
Although this fly is more an art fly than it is a fishing fly, I have been incorporating some of these ideas into fishing flies. When I get a chance to fish for Atlantic salmon again, I intend to offer them a Pompadour, and hope they accept.