

|
JOURNEY THROUGH A FLY
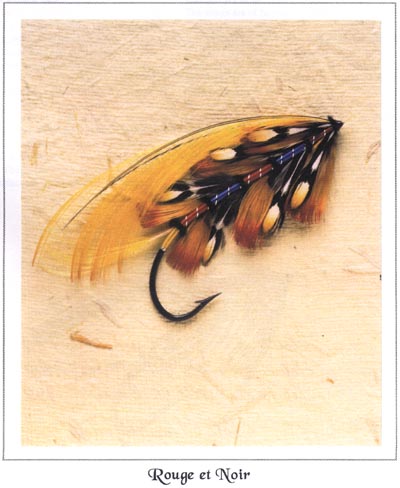
Tom Juracek I thought it might be interesting to examine a fly closely along with the tying steps I took to produce it. The fly demonstrated is the "Rouge et Noir" (French for red and black, also the name of a gambling card game). Let's start off with the pattern description: Rouge et Noir (Traherne) Tag: Silver twist and topping-colored silk. I selected a rather long-shanked hook in order to accommodate the numerous body veilings and allow each to stand distinctly on it's own. I could have selected a shorter shank and the veilings would have crowded or overlapped each other. This style is not necessarily bad, but I prefer the cleaner look of separated veilings. The gut eye was attached to the front of the hook. I selected and formed a piece of gut that would make a smaller eye. Anticipating a small head because of the sparseness of materials in the wing, I did not want a large eye offsetting the small head. The gut was attached to the sides of the shank, rather than underneath to provide a large, flat surface to work with at the head. Attaching gut to the sides also allows me to control the thickness of the front portion of the body easier. The ends of the gut were well flattened and thread was used to ensure a smooth transition from hook shank to gut. The gut terminates just short of the rearward tinsel wrap in the claret section. Can you tell? The thread was attached at the rear of the hook and the tag tied in a normal manner. The next decision was what to do with the tail. I have found that topping wing flies generally require a tail that is longer than a married wing fly. In this particular fly, the body veilings ae going to require the wing to stand rather high. If I use a short tail I am going to have difficulty forming the toppings high enough in the wing in order to allow them to clear the body cleanly. I selected a tail that was 2x the gap of the hook. This was mounted directly atop the hook shank. Upon reflection, the tail is of the proper length, but could have been a little higher and not quite so straight out of the rear butt. This would have helped to elevate the wing a little more. The rear butt is a tough one. I have but one material tied down when I am prepared to wind the ostrich herl. I believe it is important that all of the butts and the head resemble each other as closely a possible. All the other butts will require at least 6 materials before tying in the ostrich. Yet this butt has but two materials tied off before tying it in. So, how many turns of herl are required on all the other butts? This will determine how many I should make on this butt, whether they are required or not. Before giving you the answer, let's stop a moment and look at my selection of herl. I selected a piece from the middle of the feather that I felt had relatively small barbs. I wanted my butts to be nice and tight. Because the rear, butt is generally a cleaner wrap with the herl, I decided to make 5 turns. I anticipated that I may not get 5 turns on the other butts, but I should get 4 and should be able to make them all even. I am generally unable to get the turns of ostrich herl on mid-body butts as close together as I can on the rear butt, thus the extra turn at the rear. I decided to make all of the body sections of equal size. Because they are going to be small with 5 sections anyway, I feel that making any smaller than 1/5 of the remaining hook shank will be too small. So I try and divide the area from in front of the rear butt to the rear of the lacquered portion of the head equally. Thus, each body section is made of a floss portion and an ostrich herl butt. In tying the floss section of the body I do the following: I advance the thread to the start of the forward butt. I remove 5 turns of thread and clip the tinsel ribbing. I then wind back on 3 turns of thread. This completely cover the butt of the tinsel ribbing, but does not allow it to extend into the ostrich herl butt area. I tie in the floss with two wraps of thread. At this time my thread has returned to the rear of the forward butt, but I have not used any of the butt area for tying so far. The floss is wrapped back to the rear butt and then forward again. The two turns of thread that tied in the floss were not covered on the way to the rear butt, but are now covered when wrapping forward. This gives the slightest taper to the front of the body section that if all works out well will not be visible in the finished fly. The tinsel is then wrapped over the floss. I elected to bring it up and tie off on the near side for two reasons. First, without that brief glimpse of tinsel the forward section of the body looked bare between the second turn of tinsel and the butt. Second, I did not want the tinsel tied off on the underside of the shank because that would make it difficult to seat the veiling feathers properly. I thought three turns of tinsel per body section were too many, which is why I chose two. In placing the veiling feathers on the hook shank I tied the underside feathers on first. The tie off of the floss was accomplished with 2 turns of thread. One of these was removed and two more added to tie off the tinsel. The thread was advanced rearward to tie on the bottom veilings with two turns. A final rearward turn was made to secure the top veiling feathers and then one additional turn forward was made. By the way, I only slightly bent the stems of the crow feathers and did not impart any bend to the jungle feathers in order to get them to stand away from the shank. As you recall I had left a minor taper to the floss when I wrapped it. This minor taper was sufficient to make the feathers sit up in proper position. This second turn was removed to tie in the ostrich herl, and then the thread was advanced forward three turns. The thread turns were made as neat a possible so that a smooth surface was rendered for the ostrich herl to be wound upon. As previously stated, 4 turns of herl then comprised the butt. This technique was repeated for each body section until the underside of the throat was tied in. When it was time to tie in the top section of the throat it was time for a command decision. So far I had been trying to make each veiling slightly longer than the previous one and had been attempting to maintain a consistent angle to each set of veilings. You can crituque the fly and decide whether I was successful in so ding and whether the top to the fly mirrors the bottom. Where were we? Ah, the bottom throat had been tied in and thetop of the hook was bare at the head position. Now how to eliminate that most vexing problem, that Mr. Nolte would refer to as the forward creeping head syndrome (FCHS). FCHS is a problem wherein the rear of the top of the head starts significantly forward of the point where the rear of the bottom of the head is located. While this can be a problem on married wing flies, it is particularly a problem on topping wing flies. This because the thickness of each topping stem forces the thread forward as each topping is stacked atop the previous one. If 5 or 6 toppings are to be stacked, the thread is going to end up tying the final one in at a point that is in front of where the first one was tied in by the thickness of the stem of the intervening toppings. Two significant steps were taken to eliminate the FCHS. |
 |
| Diagram one shows how I flattened the toppings prior to tying in. Note that I did not just flatten the portion to be tied down, but also flattened a portion of the stem that flows away from the hook shank. This eliminated part of th thickness of the stem that caused FCHS. However, there was still some width to the stems and FCHS would still come into play without diagram 2. |
 |
| As the first topping was tied in (and I tied the first two in together), I purposely did not tie them in at the point where the quill was bent. Rather, I tied them in with the bend in the quill somewhat behind the tie in point. The quill that was to be tied down for the first topping extends from the front of the head all the way back past the tie in point to a position slightly over the body. Each subsequent topping is tied in with the waste end slightly shorter in order to allow a tapered head, as shown, but with enough width that a herl head can be formed.
Three toppings were tied in. At this point the upper veilings were added. I did this so that I could again maintain a consistent angle to each body veiling. Had I tied in the upper veilings prior to tying in a topping, the downward pressure exerted by the toppings would have forced the upper throat veilings to lay much lower to the hook shank. As it is, they are slightly pressured, but not nearly as much as they might have been. Having tied those veilings on, the remaining two toppings were added one at a time. Horns were formed and tied in with the distinct idea of having them conform to the upper line of the toppings as closely as possible. You may or may not like this look, but it was what I was after when I tied this fly. Finally, we come to the herl head. I wanted the head to approximate the other butts as closely as possible. However, I have tied down a significantly greater amount of material at the head position than I did at any other butt location and the diameter of the head is much larger than the hook shank was under any of the butts. I need to maintain a consistent size and shape. How will I do it? I selected a piece of herl from he tip of a the ostrich feather, rather the from a location next to where I have been working(which as you will recall was somewhere near the middle of the feather). As a result the barbules on this piece of herl are much shorter than those on the pieces I have previously been working with. The shorter barbule length combined with the larger diameter base will allow the head to be no larger from top to bottom than any of the butts along the body. Now if I am successful, I will also be able to make just 4 turns of herl at the head and keep the look consistent with the other butts. I wound the butt from the rear of the head forward and then tied off the on the bottom of the shank. I wasn't real thrilled with the taper to the thread portion of the head on the upper part of the fly, but other than that, all seemed to turn out well. Realistically, the thread portion of the head ended up being larger than it needed to be. Some rather thick head cement added to this problem. We have now walked through how I tied this fly. Hopefully there were a few ideas that will help in your tying, as that was the principle reason for this article. In critiquing the fly, I wish I had maintained a little more wing height. Adding a sixth topping may have provided that height. I did end up a little short on the claret body section from the length of the other body sections. I had also hoped to avoid having topping barbs falling below the tail outline, but a couple still managed to get down there. Finally, I didn't quite get the consistent angle out of the throat veilings I was looking for. It's close, but no cigar. |